Showing posts with label Projects. Show all posts

Tuesday, January 10, 2012

Custom Kitchen Cabinets

So, by now I am sure you get the point that we were on a mission to make our kitchen more functional and organized during our time off. We customized our pantry {more about that here} and customized our kitchen drawers {more about that here}. The next and last item on our agenda was to make an easy to access space for our pots and pans. Up until now they were crammed in to the back of a corner cabinet and you were likely to be injured if you attempted to get one out. After much searching on the Internet we really loved the fancy pull out drawers that a lot of the high end kitchens have. Which got Talon's wheels to spinning and the idea of making our own custom pull out drawers evolved....
This is a bottom cabinet and used to hold unnecessary kitchen items {ex: crock pot - could totally be re-located to a less easier to reach location since we do not use it on a daily basis}. So, it was a prime candidate for the mini-makeover.
This is how Talon said we did it {my portion was all moral support}: We measured the cabinet opening and determined the location of the trays. We then glued and tacked in some support risers for the slides {which we purchased at Home Depot} to be screwed into. We then had to determine the height that the slide needed to be, leveled it, then screwed them in {this had to be done for both sides and both drawers}. Up next it was time to build the drawers themselves. We measured the distance between the slides to determine the drawer width. The MDF that we were using was cut down to the appropriate width. We also had to cut strips that equal the depth that we wanted the drawers to be. Once everything was glued and nailed together all we had to do was mount them on the slides.
This has by far been the greatest thing we have done in our kitchen. It's no longer a fight to get a pot or a pan for cooking. We simply open the cabinet and pull out a drawer. The slides that we used allow the trays to extend all the way out of the cabinet making it even easier to grab things from the back. That wraps up our kitchen organization/customization craziness but we are already brewing other ideas for the future!  

Wednesday, January 4, 2012

Pantry Makeover

Talon and I had 10 full days off of work. It was glorious! Of course, several of those days were filled with Christmas activities but I had a big plans for the others....
Yep,a Christmas vacation 'to do' list. Have I mentioned that I have no idea how to relax? Literally, I can't sit still. If I do, I go straight to sleep. Lucky for me...Tal was on board for the majority of the list. In case you have trouble reading here is a quick run down. 1. Pantry {More about that in a minute} 2. Go to Movies {Had to have fun stuff to look forward to! Plus we never do this because it is SO darn expensive.} 3. Clean Oven {The inside of course. Just one of those things we never get around to doing}. 4. Wash Duvet {Easy task. I love to check things off a list} 5. Organize Attic {Not so easy task but was a great time to do it since we would be putting up Christmas decor} 6. Starbucks Date {So fun} 7. Clothes Shopping {This was for Tal - I have no problem making time to clothes shop for myself:)} 8. Paint Office {More on that later} 9. Stencil Office {More on that later} 10. Fish Scale Art {More on that later} 11. Ping Pong {Nothing better than a little competition to spice the week up} 12. Drawer Organization {Again, more on this later in the week}How's that for a Christmas Vacation? It was SO much fun though. Talon and I love doing projects together...nothing better than quality time spent covered in dust and paint:) So, first on the list was our pantry. Not to long ago we built a custom spice rack for the back of our pantry door. More about that here. It has been so wonderful that we wanted to do some more updates in the ol' pantry. See those ugly wire shelves....
We wanted to get rid of them and that is what we planned on doing. Here is how....First up, removing all of the wire shelves and hardware. We plan to craigslist them to cover some of the cost of the new shelves.  
Once done, we were left with lots and lots of holes to deal with. 
We used Spackling to patch all of the holes. It's purple when you apply and turns white once ready to be sanded down. Making it very easy to use.
After the holes were patched I gave it a nice coat of paint to pretty it up. Luckily, I was already painting the office (remember that was on our to do list too) and the color was only a hair darker than what our kitchen is so I was able to use that and it blends very nicely!  Once all the prep work was done we were ready to tackle the big stuff...the shelves themselves. We purchased and sanded pine plywood ($26, 4x8 sheet), 6ft 1x6 select pine for facing and 3 1x2 select pine for the shelving cleats. Once we found the studs in the pantry we then determined appropriate shelf depth. We then cut the cleats to the appropriate length. Pre-drilled and countersinked the cleats to the pantry wall with 3" drywall screws. The pantry shelves were cut out of the sanded pine plywood to the appropriate depth and width and nailed in place with a nail gun. 
We then measured and ripped down 1x6s to the appropriate width for the facing. They were then nailed in place with the nail gun. All seams were caulked and wood filler was used on the joints. Allowed to dry and then it was all sanded....
After a fresh coat of white paint....they were ready to hold all of our daily necessities!
No more falling through the cracks of the wire shelf. We can utilize the entire space and it glorious!
We've been collecting storage containers from IKEA to help organize this space.The labels are hand written so they can be removed and modified easily depending on what is being stored in each piece.
Is it weird that when anyone comes over I want to scream "look how awesome our pantry is!"??? Yep, we love it that much. Between the spice rack and all the added shelf space it's perfect!
Total cost for this pantry makeover (shelves only) was around $50.00 (excluding things we already had like paint, wood filler, nails and the fact that we only had to use 1/2 the sheet of plywood). We think it was well worth the time and money spent since the pantry is something we utilize every single day. Anything to make life a little easier!

Thursday, December 22, 2011

Glass Lamp

Getting so close to Christmas I can hardly stand it!! So excited for all of the festivities. However, there's still a day of work left. Let's make that go faster by looking at our updated lamp....
That's what it looked like when my mom and I picked it up at a yard sale a few months back. I've seen this glass lamp style everywhere over the past few months.
Although this one wasn't exactly a looker at first I had high hopes that we could dress it up with a can of spray paint.
I was able to pull the whole thing apart (kinda) via a bolt on the bottom.
I cleaned it up really good and taped off the important stuff so that spray paint would not touch it.
1 can of Oil Rubbed Bronze later....
It didn't turn out to shabby at all and I have to admit I had my doubts.
I picked up the lamp shade at Target. I think it's a tad small for the lamp but it will do for now.
I love that I could potentially fill that glass lamp base with whatever I wanted. For instance, Christmas decor! Why am I only thinking of this two days before Christmas?
What do you think? Any comparison to those with the high price tags?

Friday, December 9, 2011

Cane Chair

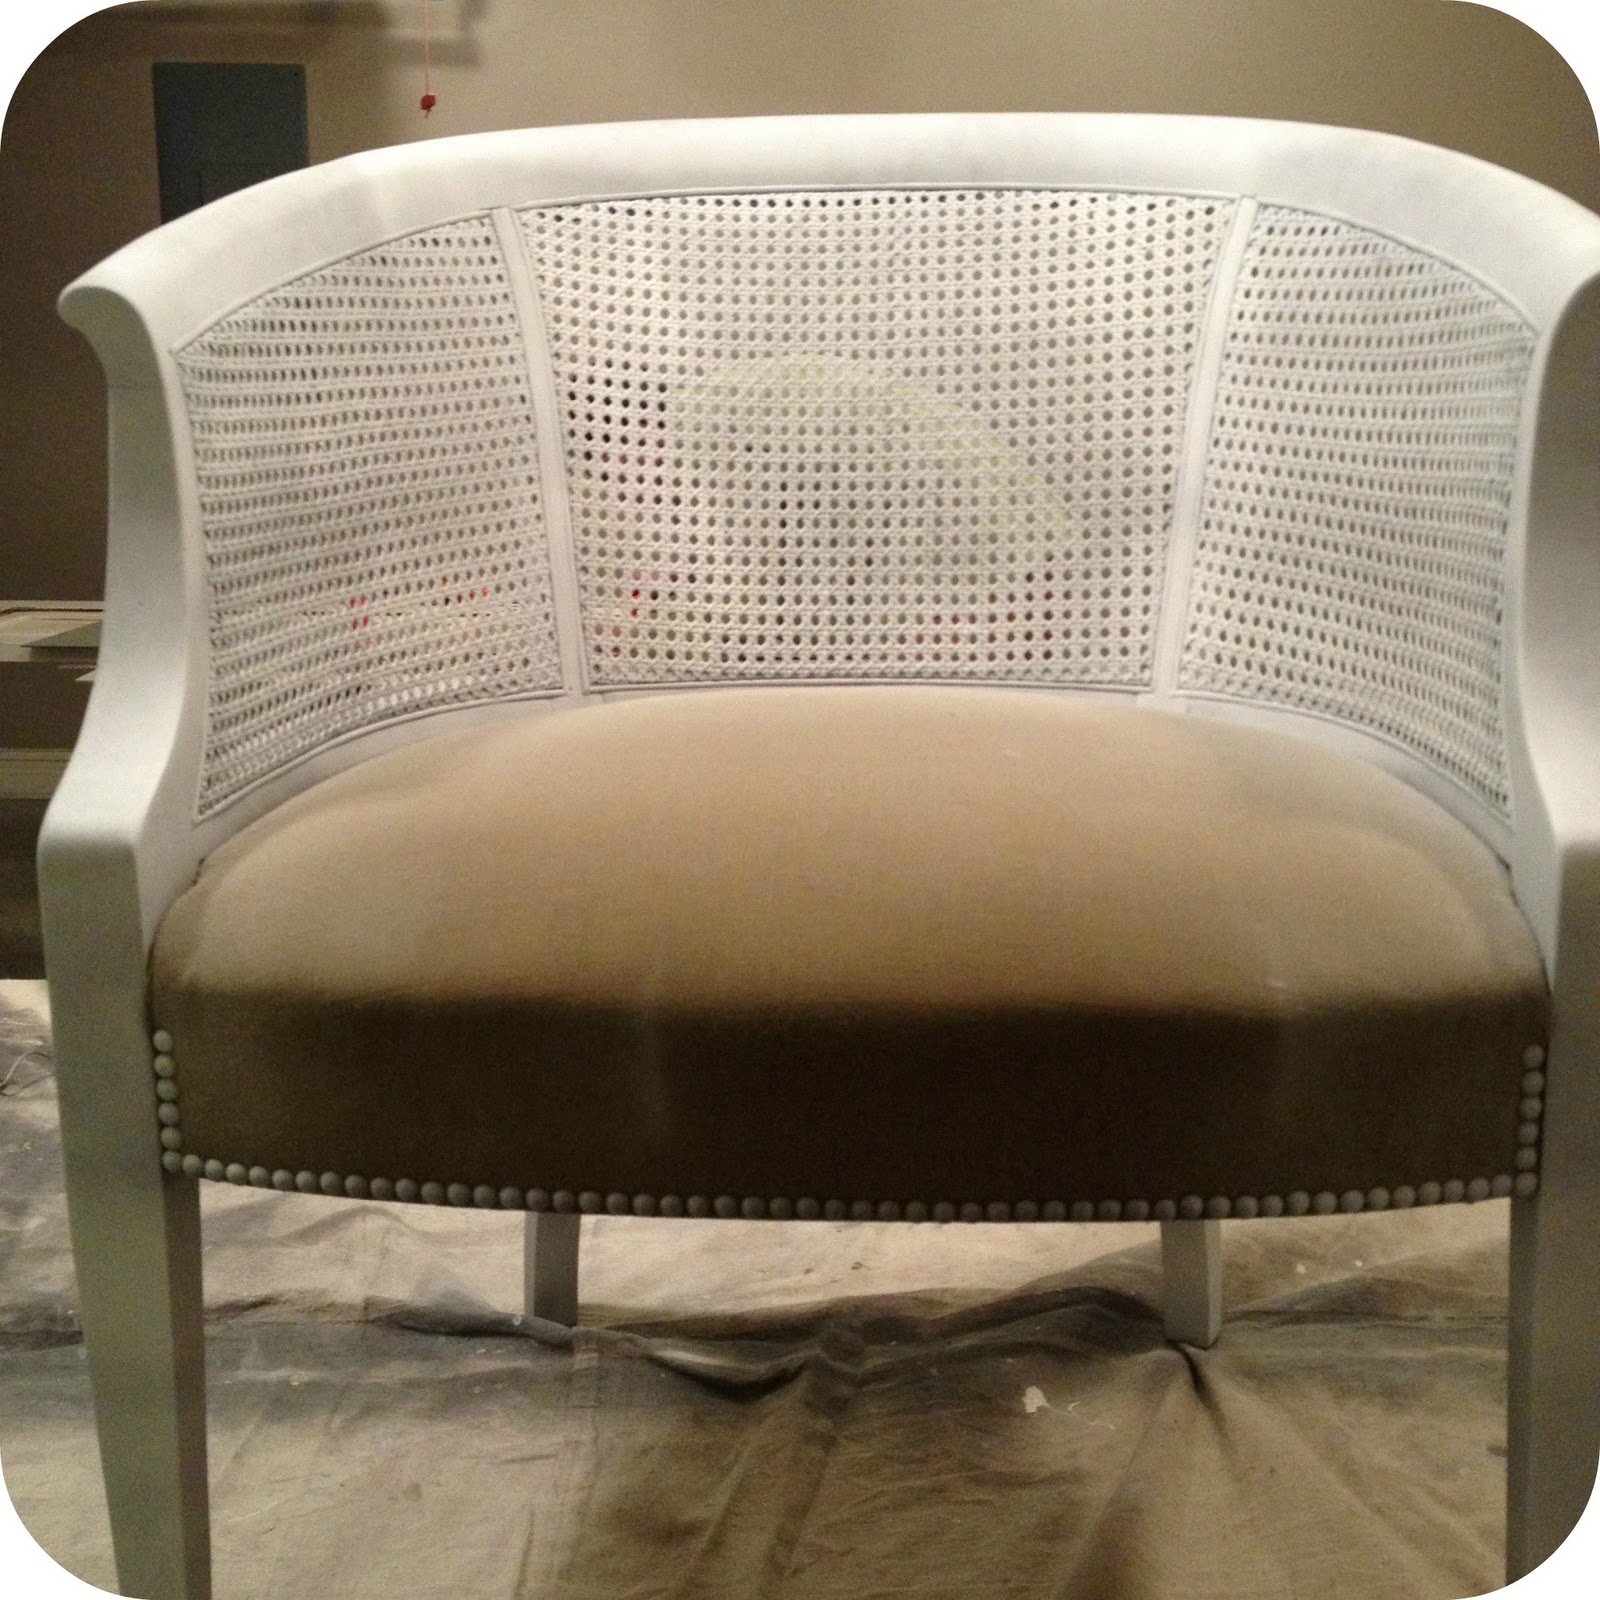
This past weekend I finally got around to updating the cane chair I scored at a yard sale a month or so back. Remember...I talked about it here and here. Here's the before shot...
I decided that tearing down the fabric since it had all those tacks would be more work than I wanted to put in to it. So I did the lazy thing and just went straight to the spray paint....
It took several coats of the Krylon Dual Paint and Primer in One to get this bad boy to go white.
 Then I ran out to JoAnns and bought discount fabric that semi-matched my living room and started re-covering the seat. I was about half way finished when I realized tearing off the old fabric to use as a pattern would have been about six bajillion times easier. Live and Learn.
 I'm loving the newest addition that also provides additional seating. Gotta love functional pieces.
Not bad for $12.00....
 I even made a fun pillow with the leftover fabric. Which almost ended in me throwing my sewing machine out the window. Literally. Why is it every time I break that thing out I want to slam it in the wall??
 We have a fun weekend planned...so happy it's Friday!

Wednesday, December 7, 2011

Easy Wreath

My Mom had this wreath in her goodwill pile this past weekend. I've been wanting a wreath for our back porch for a while now...so I snatched it in hopes that I could make it come to life....
In the midst of spraying a dozen other things white over the weekend this wreath got caught up in the paint. It was surprisingly really easy to spray. Only took about two coats on each side and she was done.
 I tried to get creative and think of something fun for Christmas I could do with it...like add ornaments or Christmas ribbon. So far, all I've come up with is this burlap ribbon. I made it from burlap I bought at Lowe's. Did you know that you can buy burlap at Lowe's? Well you can. It's in the garden section. It comes in a roll and is great because it has edges that are seamed together - which is great for projects like this.

At least with just simple burlap I can keep it up after Christmas...here's to a very easy project!

Monday, December 5, 2011

Door = Mirror

Doors are kind of every where right now. Bloggers/Crafters are making everything out of them. We have been on the band wagon for a while ourselves. Pre-blog we made a headboard for our guest bedroom that is still one of my favorite pieces in our home. The second experiment started off as a possible farm table for our dining room. We were so indecisive on what we wanted we moved on to creating something we actually needed with it. A mirror for our master bedroom. We were using one of those hang over the door mirrors from college. Needless to say that thing is already at the goodwill. Very happy to see it go. Lucky for us my Dad seems to have a never ending supply of doors. We went through and picked out one that would be a good size and that also had a single insert instead of multiple panels. See below....
Talon removed the trim from the outside of the insert of the door. We wanted the mirror to sit flush inside the door panel. I didn't want the fact that it was an old door to be completely obvious. You.know...stay away from being to terribly trendy. Once the trim was removed Talon took measurements and ordered our mirror.
The way our mirror was inserted into the door it did not need to be thick. Therefore, it only cost us $25.00 for our piece of glass (that's total - for the glass and having them cut it).
 We carefully placed the glass on the door to ensure it was going to fit as we wanted...
 Once done we debated whether or not to add trim around the frame. We decided against it. We both didn't think it was necessary.   
 After cleaning it really well we used mirror adhesive to glue the mirror to our door.
 We moved it straight in to our bedroom. Talon used tape to make sure it wasn't going anywhere. 2 days later and it's still in tact.
 Here is the final product....
 I must admit that it came out about a thousand times better than I ever thought it would. I think it's the perfect mix of unique and functional.
 I especially love that we were able to ditch our old college over the door mirror.
 Yah for a 25.00 full body mirror. Those things are expensive to purchase! Happy Monday everyone!

Friday, December 2, 2011

Door Jam.

I updated our front door with some Christmas goodness. I made these wreaths last year using this tutorial. They were really easy to make and are very easy to update from year to year.
 I did just that this year. I added a little more silvery bling to each of them. I'm debating the addition of some fun blue ornaments...just to get crazy with it:)
Our front door is ready for the holidays!

Thursday, December 1, 2011

Christmas Card Display

This year I wanted something pretty to hang all those Christmas cards that come in the mail. Luckily, not to long ago my Dad gave me an old frame. I painted it white and it had been leaning up against a wall on a dresser for a while. I kind of new it would get it's real makeover when Christmas came around. I started by nailing 4 rows of nails equally across from each other down both sides of the frame. In the beginning I tied the string in straight lines across the frame. The twine wasn't strong enough to display cards and not droop down to far....
So, I went to plan b. Which was connecting the twine in a criss cross pattern across the frame. This was so much easier and looked a 100 times better.

Once I was done...I thought it needed a little extra something....bring on the big bulbs... 
 
I'm using clothes pins to hold the cards on the twin and lights....
Such a fun way to display cards from those that we love this Christmas season:)
This has gotten me so pumped for other holiday crafts! It's officially December...Merry Christmas everyone!